








Introduction
Learning how to thread sewing machine correctly is one of the first skills every beginner should master. Proper threading helps the machine form even stitches, prevents thread breakage, and makes sewing much easier. Although different machines have slightly different designs, the basic threading process is usually similar. With a little practice and careful attention to the thread path, you can confidently prepare your machine for everyday sewing projects.
Why Proper Sewing Machine Threading Matters
A sewing machine depends on several components working together to create a stitch. The upper thread must travel through the correct guides before reaching the needle, while the bobbin supplies the lower thread.
If the upper thread is incorrectly positioned, you may notice:
- Loose stitches
- Thread bunching
- Frequent thread breaks
- Uneven tension
- Skipped stitches
- Fabric pulling
Taking an extra minute to thread the machine correctly can prevent many common sewing problems.
Before You Start Threading
Before learning how to thread sewing machine, prepare everything you need.
Items You Need
- Sewing machine
- Matching thread spool
- Correct bobbin
- Sewing machine needle
- Small piece of scrap fabric
- Scissors
Always make sure the machine is switched off while threading the upper thread, especially when you are still learning the process.
Step 1: Raise the Presser Foot
Start by raising the presser foot.
This is important because lifting the presser foot opens the tension discs inside many sewing machines. The thread can then move into the correct position more easily.
If the presser foot remains down, the thread may not sit correctly in the tension mechanism.
Raise the Needle
Use the handwheel or needle-position button to raise the needle to its highest point.
The take-up lever should also be positioned where it is easy to see.
This makes the threading process much simpler.
Step 2: Place the Thread Spool
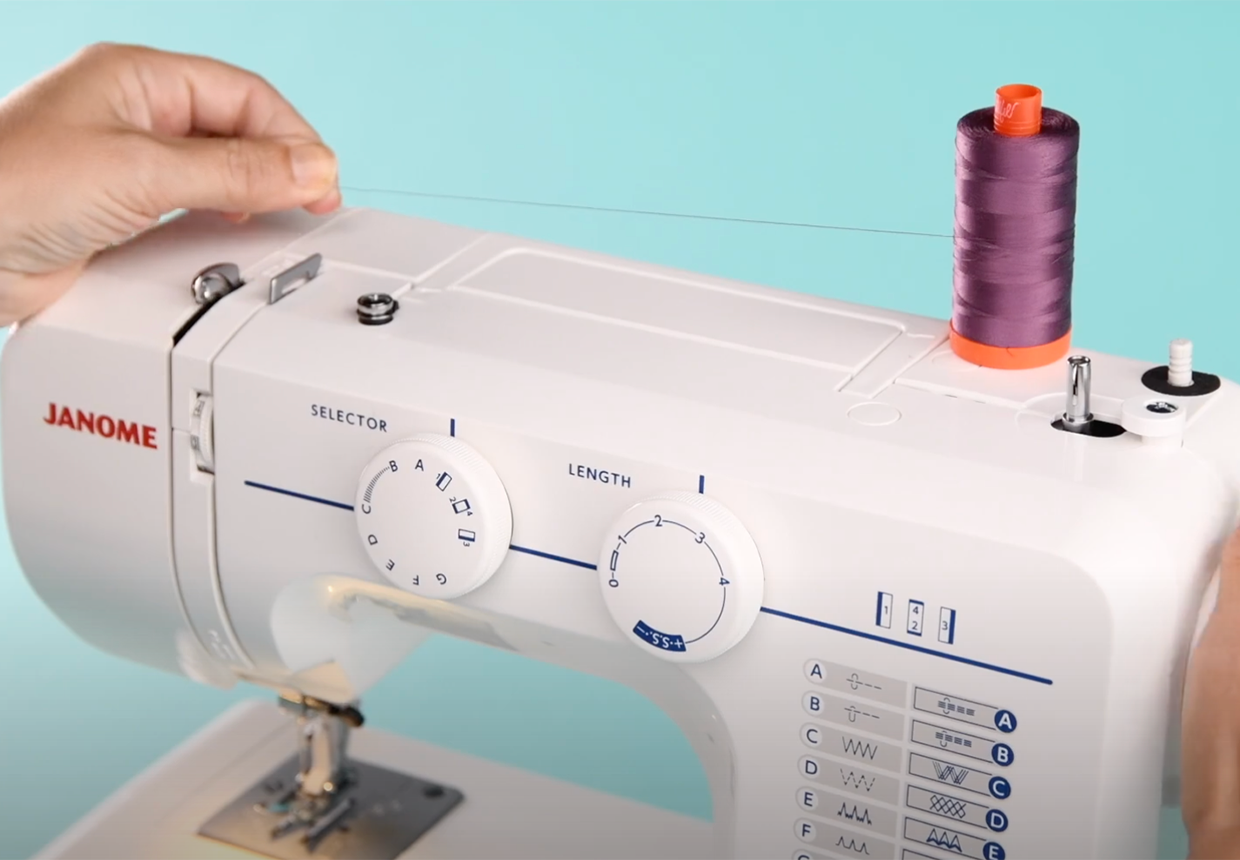
Put your thread spool onto the spool pin.
Depending on your machine, there may be a small spool holder or cap that keeps the thread in position.
Make sure the spool can rotate smoothly as thread is pulled from it.
If the spool does not move properly, the thread may become tangled or break during sewing.
Step 3: Follow the Thread Guide
Take the end of the thread and guide it through the first thread guide.
Most sewing machines have arrows, numbers, or diagrams showing the correct path.
Follow the machine’s designated route rather than guessing.
Why the Thread Path Matters
The thread path controls how the thread moves through the machine.
A typical route may include:
- Upper thread guide
- Tension area
- Take-up lever
- Additional thread guides
- Needle guide
- Needle eye
The exact arrangement differs between sewing machine models.
Step 4: Thread the Tension Area
Guide the thread down toward the tension mechanism.
On many machines, the thread needs to pass between tension discs.
Keeping the presser foot raised helps the thread enter this area properly.
After passing through the tension section, bring the thread back upward toward the take-up lever.
Step 5: Pass the Thread Through the Take-Up Lever
The take-up lever moves up and down while the machine operates.
Threading this part correctly is essential.
Move the handwheel until the lever is visible, then guide the thread through the appropriate opening.
If the thread misses the take-up lever, the machine may produce poor stitches or cause the thread to become loose.
Step 6: Guide the Thread Toward the Needle
After threading the take-up lever, guide the thread downward.
Pass it through any remaining thread guides near the needle.
These small guides help keep the thread aligned while the needle moves.
Take your time at this stage because skipping even one guide can affect stitch quality.
Step 7: Thread the Needle
Finally, thread the needle from the correct direction.
The direction depends on the sewing machine model, so check the machine’s threading diagram if necessary.
Pull several inches of thread through the needle eye.
Keep the thread tail behind the needle and underneath the presser foot.
A Simple Needle-Threading Tip
If you have difficulty seeing the needle eye, place a contrasting piece of fabric behind the needle or use good lighting.
A needle threader can also make this step easier.
Step 8: Insert and Thread the Bobbin
Threading the upper part of the machine is only half the process.
The bobbin provides the lower thread needed to form a complete stitch.
There are two common bobbin systems:
- Front-loading bobbin
- Top-loading bobbin
The correct method depends on your machine.
Front-Loading Bobbin
A front-loading system usually requires the bobbin to be placed inside a removable bobbin case.
The thread must pass through the case’s tension slot in the correct direction.
Top-Loading Bobbin
A top-loading bobbin is placed beneath a transparent or removable cover near the needle plate.
The bobbin thread follows a marked path before being pulled upward.
Upper Thread vs. Bobbin Thread
Understanding the two thread systems makes troubleshooting easier.
| Feature | Upper Thread | Bobbin Thread |
|---|---|---|
| Location | Top of machine | Lower section |
| Source | Thread spool | Bobbin |
| Passes through | Guides and needle | Bobbin case or guide |
| Main purpose | Forms upper stitch | Forms lower stitch |
| Common issue | Incorrect tension | Incorrect insertion |
Both threads must work together for a balanced stitch.
Step 9: Bring Up the Bobbin Thread
Hold the end of the upper thread loosely.
Turn the handwheel toward you for one complete needle movement.
The upper thread should catch the bobbin thread and bring it upward through the needle plate.
Pull both thread ends toward the back of the machine.
Now your machine should be ready to sew.
Test the Threading
Before starting your actual project, test the machine on scrap fabric.
Choose a moderate stitch length and sew a few lines.
Look at both sides of the fabric.
A properly threaded machine should produce relatively even stitches without excessive loops or bunching.
What to Check
Watch for:
- Balanced stitches
- Smooth thread movement
- No unusual noise
- No thread breaking
- No fabric gathering
- Correct tension
Testing first can save time and prevent damage to your project.
Common Threading Mistakes
Beginners often make a few predictable mistakes.
Forgetting the Take-Up Lever
Missing the take-up lever is a common cause of poor stitching.
Threading With the Presser Foot Down
This can prevent the thread from entering the tension area correctly.
Using the Wrong Bobbin
Bobbin size and type vary between machines. Using an incompatible bobbin can cause stitching problems.
Pulling the Thread Too Hard
The thread should move smoothly. Excessive force can cause tangles or breakage.
Ignoring the Machine Diagram
Most machines include a threading guide for a reason. Following it is usually easier than trying to remember every step.
Tips for Easier Sewing Machine Threading
Once you understand the process, threading becomes much faster.
Try these habits:
- Keep your machine clean
- Use good-quality thread
- Replace damaged needles
- Follow the machine’s threading diagram
- Raise the presser foot
- Keep the thread path clear
- Test stitches before starting a project
Regular maintenance can also improve the overall sewing experience.
Frequently Asked Questions
1. Is threading a sewing machine difficult?
It may seem complicated at first, but most beginners can learn the process with practice. Following the machine’s numbered threading path makes it easier.
2. Why does my sewing machine thread keep breaking?
Incorrect threading, unsuitable tension, a damaged needle, poor-quality thread, or an incorrect thread path can cause repeated thread breaks.
3. Should the presser foot be up when threading?
Yes. Raising the presser foot helps the upper thread enter the tension mechanism correctly on many sewing machines.
4. Why won’t my sewing machine pick up the bobbin thread?
The bobbin may be inserted incorrectly, the upper thread may not be properly threaded, or the needle may not be positioned correctly. Recheck both threading paths.
5. How often should I rethread my sewing machine?
You should rethread the machine whenever the thread runs out, breaks, becomes tangled, or you change thread colors or types.
Conclusion
Learning how to thread sewing machine correctly is an essential foundation for successful sewing. The process generally involves placing the spool, following the thread guides, passing through the tension area and take-up lever, threading the needle, and correctly installing the bobbin. With regular practice, these steps become quick and natural. Always follow your machine’s specific threading diagram and test the stitches on scrap fabric before beginning an important project.